|
|
|
| Updated October
3, 2004
|
Use the blue menu here below to navigate.
Sefy's Complete DVD Backup Guide v2.6
| Using - Dr. DivX |
|
A New and Easy to use program that helps you backup your DVD Movie, or
even capture from a TV or Digital Camera into a High Quality DivX file.
Recommanded by many over the web. This program isn't a GUI, it's self
contained and does everything need by itself.
NOTE: I am not affiliated with DivXNetworks in any way, I've only recieved permission to write a guide for this program.
|
|
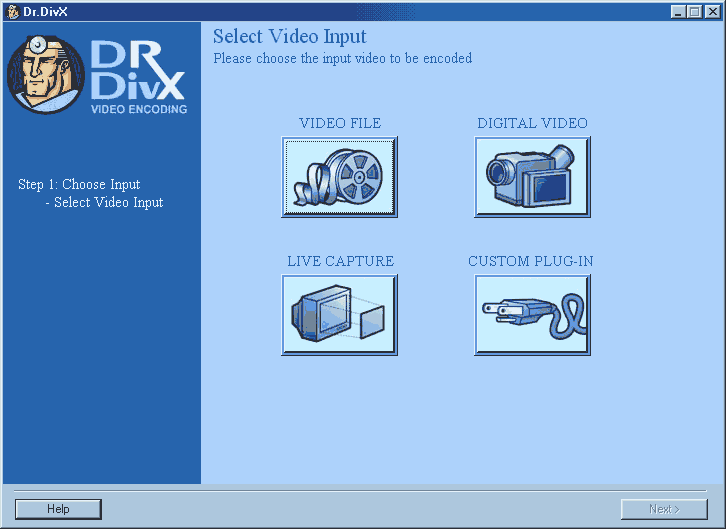
Step 1 (a/b) - Select Video Input
In this example I will backup a DVD into a DivX® video, to do so, click on the "VIDEO FILE"
and from the list of files, go to your DVD Drive and select the first
VOB from your movie, the program will pop up a window with the entire
set of VOB files (b) so just click on "OK" to confirm.
b) 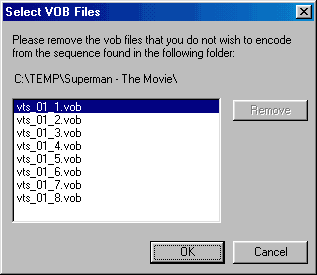 |
|
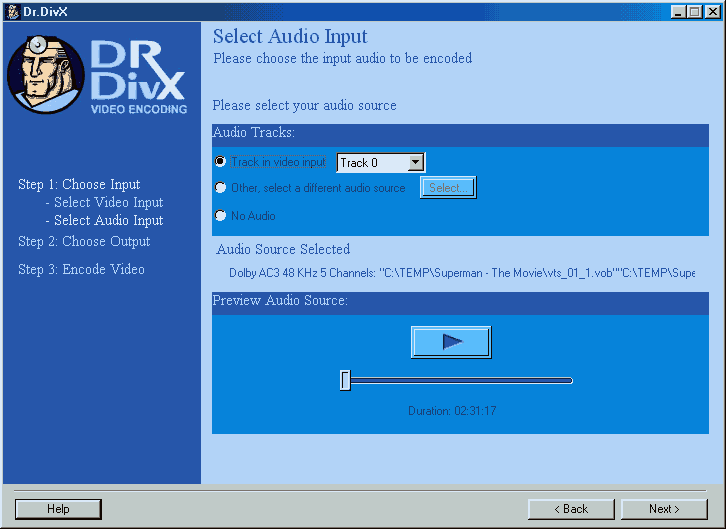
Step 2 - Select Audio Input
Here you can select if to use the "Track in video input"
and you can use the pull down list to select the Track Language, or you
can add your own audio (dubbing anyone ?) or simply to not have any
sound by selecting the "No Audio" option. You can use the "Preview Audio Source" by clicking on the "Play" button. If you are satisifed with your choice, click on "Next" to continue.
 |
|
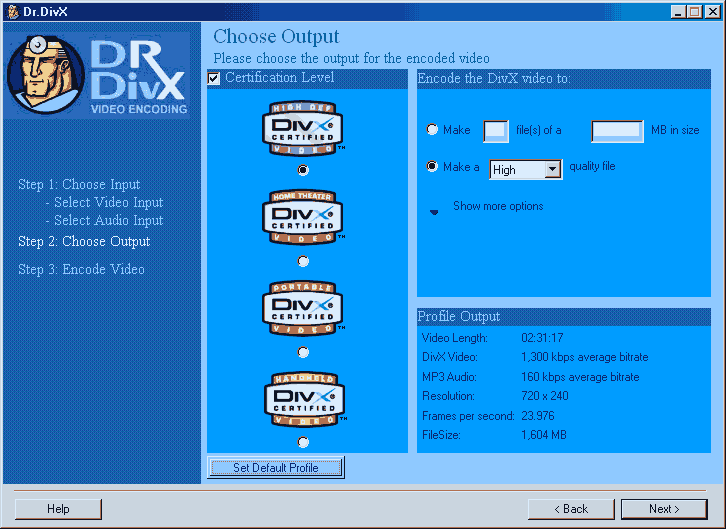
Step 3 - Choose Output
Here you select the "Certification Level" and purpose of your DivX, such as "High Def" or "Home Theater" or even for "Portable" and how many parts you want to "Encode the DivX® video to" and if to use High, Medium or Low Quality.
 |
|
Step 4a - Basic Settings
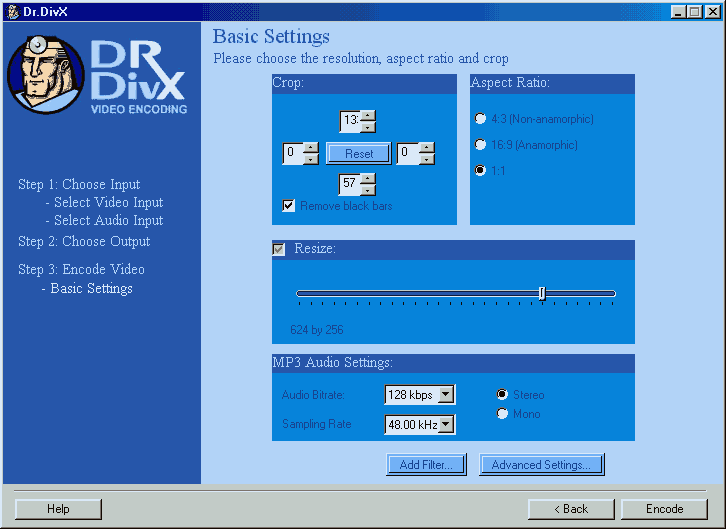
Here you can select the "Aspect Ratio" of your movie, and to what resolution you want to "Resize" it to. Also you can set the "MP3 Audio Settings" below, for Quality Level, recommanded minimum as 128kbps. You can also select to use either "Stereo" or "Mono" sound.
 |
|
Step 4b - Add Filter
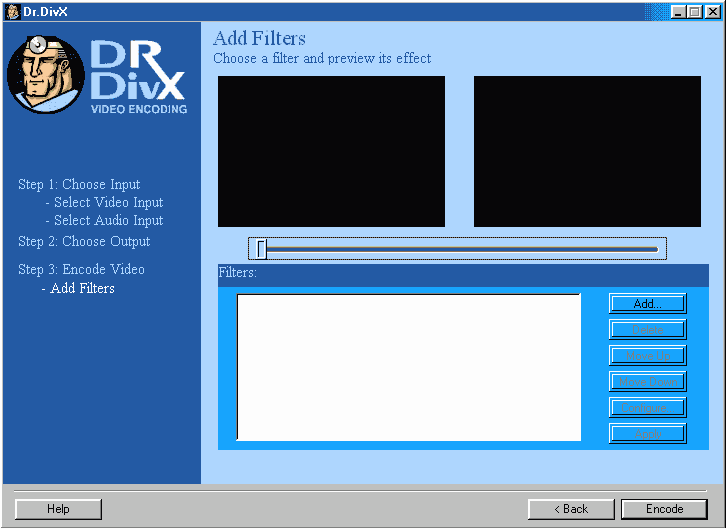
Dr. DivX supports all the Filters and Plugins from VirtualDub, all you need to do is copy them into the "Plugin\vdub"
folder under Dr. DivX and you will be able to use them within the
program. For this example i'm using the VobSub filter to add Subtitles
into the DivX movie. All you need to do is first click on the "Add Filter" and then click on "Add" to select the plugin and then "Configure" to set it up.
NOTE: Click Here to Configure the VobSub Filter for Subtitles in your Movie!
 |
|
Step 4c - Advanced Settings
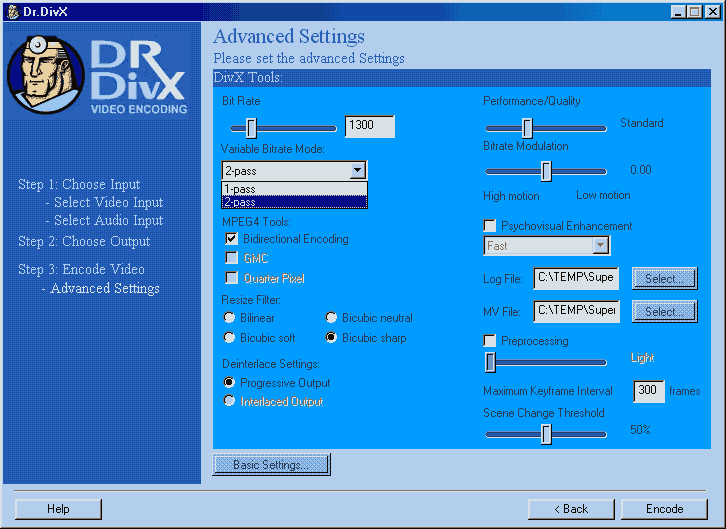
If you want to tweak up your movie settings, click on the "Advanced Settings" and now you can Set the amount of "Bit Rate" you want for your movie, how many passes the "Variable Bitrate Mode" should use, also the "Performance/Quality" level can be adjusted, you can also use the "Resize Filter" to enhance quality of the encoding.
 |
|
Step 5 - Encoding
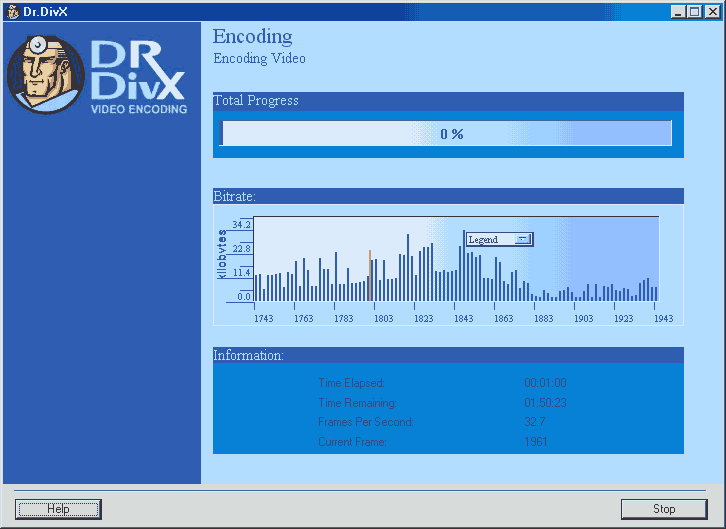
When you are completly satisfied with your settings, click on the "Encode" button to begin the process.
 |
|
|
| THE END |
|
|
|